How to Create Smart Campaigns Google Ads to Drive Traffic to You Site – A step-by-step guide
In the competitive world of marketing, driving traffic to your website is crucial for the success of your business. One effective way to achieve this is through smart campaigns Google Ads.
By creating targeted and strategic ads, you can reach potential customers at the right time and place, ultimately increasing traffic to your site.
In this step-by-step guide, in 12 steps, I put together the process of creating smart campaigns on Google Ads, providing you with the knowledge and tools to effectively drive traffic to your website and boost your online presence.
If you’re a beginner in the space of Google ads, this guide will definitely help you navigate the world of Google Ads and maximize the impact of your campaigns, to drive traffic to your site.
How to Create Smart Campaigns to Drive Traffic to Your Site.
I want to share with you all the step by step guide on how to create a Google ads campaign to drive traffic to your site that leads to conversion.
If you are a beginner and still deciding to do google ads to build your traffic to your site. This article will be very helpful.
There are two categories of Google Ads Campaign.
1. Search Campaigns
2. Smart Campaigns
Let’s focus on Smart Campaigns, which is the easiest one to drive loads of traffic at a minimal price. You are paying only when people click on your ads.
Benefits of Creating Smart Campaigns Google Ads
One thing I like about Smart Campaigns is that you can easily create a new campaign with your very targeted keywords focusing on a very specific geographical location or a specific group of people.
You have the authority to decide your budget, set the date and time in a week, and to decide where you prefer your ads to show up. Google will only do what you instructed it to do and give you your desired results.
Below are the benefits of Smart Campaigns.
- Create ads quickly and easily.
- Pay only when people click on your ads.
- Attract more customers to your website or Google Maps listing.
- Easy to adjust and edit settings to get better results. Google Ads runs your ads for you.
- Reach customers on desktop computers and mobile devices (such as mobile phones and tablets).
- Review the effectiveness of your ads on your dashboard.
- Pay only when people click your ad.
- Attract more customers to your website or Google Maps listing.
- Minimal ongoing management is necessary. Google Ads runs your ads for you.
- Reach customers on desktop computers and mobile devices (such as mobile phones and tablets).
- Review the effectiveness of your ads on your dashboard.
How to Create Create Smart Campaigns Google Ads in 12-Steps
Step 1: Create a Gmail account.
If you have an existing Gmail account, sign in and proceed to the next step.
Step 2: Set up your Google Ads Account.
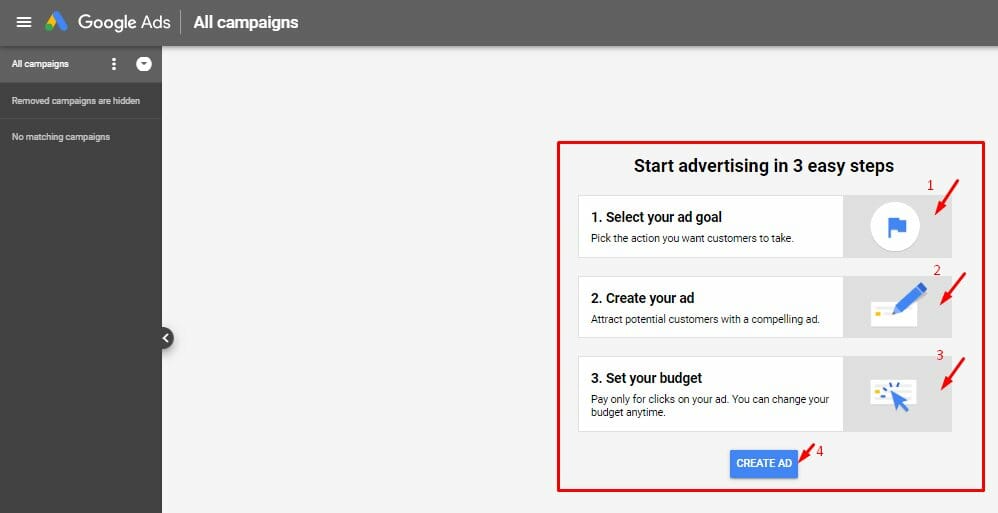
Once you successfully signed in with your Gmail account, you follow this link https://ads.google.com
to create your Google Ads Account. New Google Ads window appears like the image shown here.
From there you have three easy steps to follow to successfully create your ad.
- Setting Up Goals
- Create Ad
- Setting Up Budget
Go ahead and click the CREATE AD button.
Step 3: Select the Goal of Your Campaign.
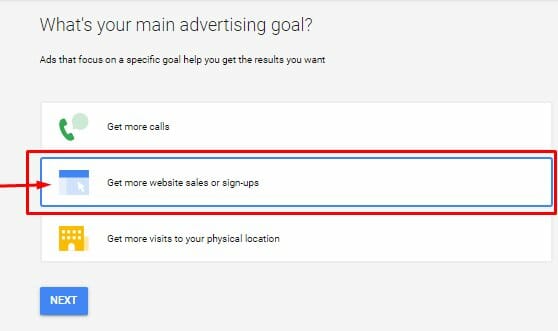
Your focus is to get more conversions on your website (sales and sign up), which is more relevant to your wealthy affiliate, as you are trying to get more traffic to your site. Select the middle button as shown on the image and click Next.
‘Get more calls’ and ‘Get more visitors to your physical location’ options are suitable to promote physical business.
Step 4: Enter Your Business Info.
Briefly describe your business in this section.
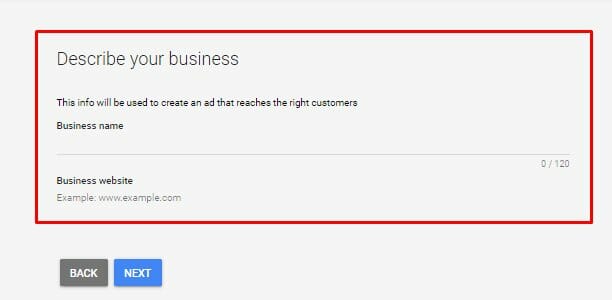
- Enter the relevant name of your business below where it is written Business Name. The name must be less than 120 characters.
- Enter your website that you want to drive the traffic to below where it is written Business Website. Follow the example.
It should look similar to the image below;
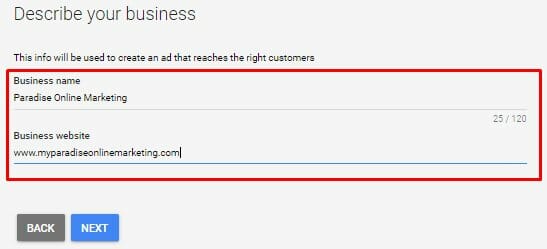
Then Click Next to continue.
Step 5: Select Your Audiences.
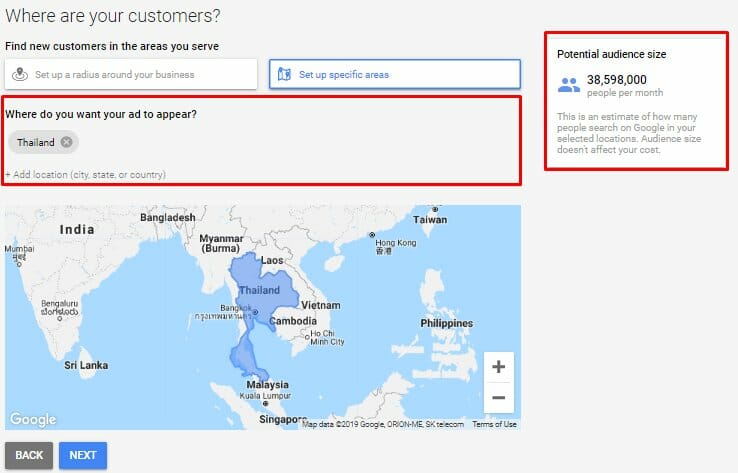
- Select ‘Set Up Specific Areas’ (It is more specific and you will know exactly where your traffics are coming from)
- Write down the names of cities, states, or countries that you prefer your Ads to appear.
- The square on your right side shows the potential audience size that your Ads will reach.
- Once you are done and satisfied with the selection of your audiences, Click Next.
NB: Note that you can still come back here to adjust and find newer customers after complete setting up your As.
Step 6: Define Your Product.
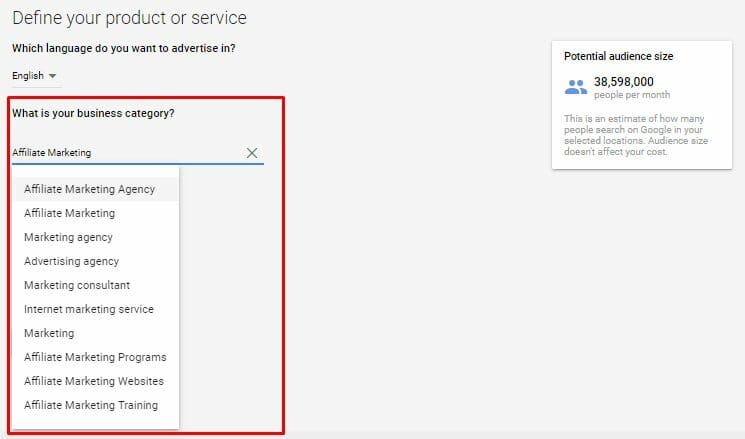
- Click the English button if you need to change the language from English to a different language.
- Under Business Category, type the name of your product or services that your Ad will be showing. For example, I typed Affiliate Marketing as my product and Google has shown me relevant related keywords that I can choose from. Google always shows broader keywords so, in order for you to narrow it down to a small and very targeted amount of audience, you need to enter your own keywords.
- Click the Add Another button to add other related keywords relevant to the business category you choose.
- When you are done defining your product Click Next.
Step 7: Write Your Ad.
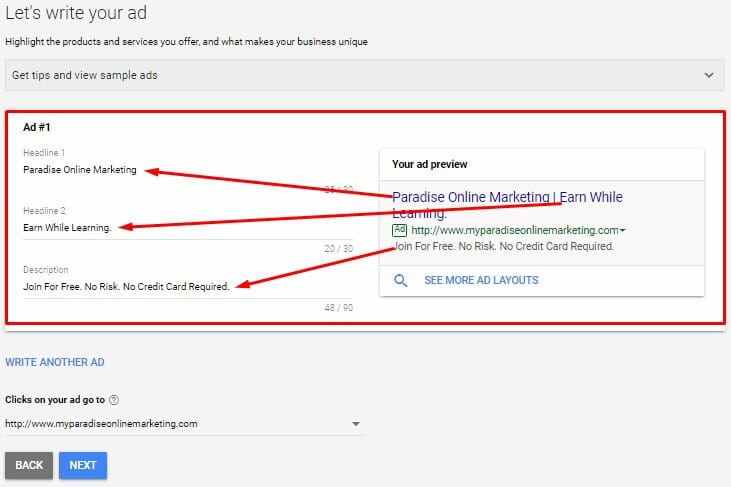
- Under Headline 1, write the name of your business or product or service that you are promoting.
- Under Headlines 2, write something attractive or catchy about your business.
- Under Description, write about something that can make your business stand out from the competition. Remember, you are now trying to compete with many other similar ads. You need to be selective with your word to make it stand out from them.
Step 8: Adding Images to Your Ad.
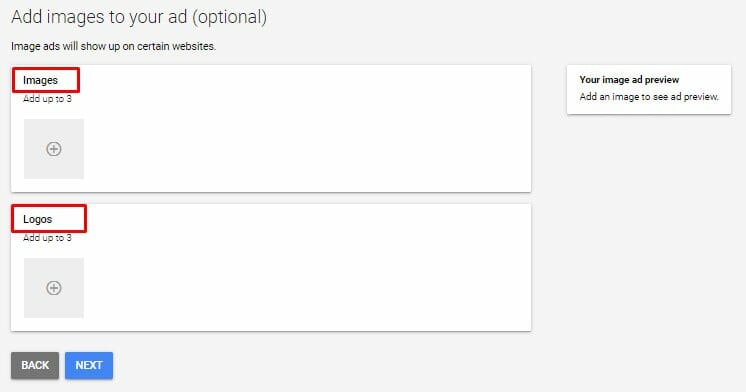
Adding images section is labeled optional but I personally consider it a very important part of ads. Images can speak volumes of words for themselves. I encourage you to add images where appropriate.
- At the Image, section adds 3 promotional images of products or services you are promoting.
- At the Logo section add 3 logos if they are different, otherwise, you can add 1 logo.
Step 9: Set Up Budget for Your Ad
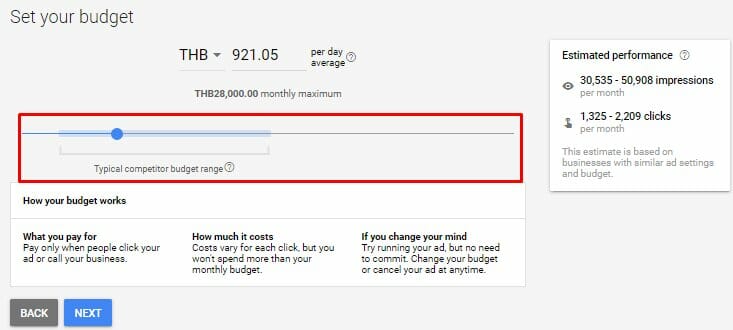
- You are in control of the budget. Any amount you set above the minimum budget per day, Google will still deliver your ads accordingly.
- Use the blue dot on the bar to slide back and forth in order to set your preferred amount or you can click and enter the amount where figures are shown.
- If you are a beginner, I encourage you to start with the lowest minimum amount per day.
Step 10: Review Your Campaign Settings
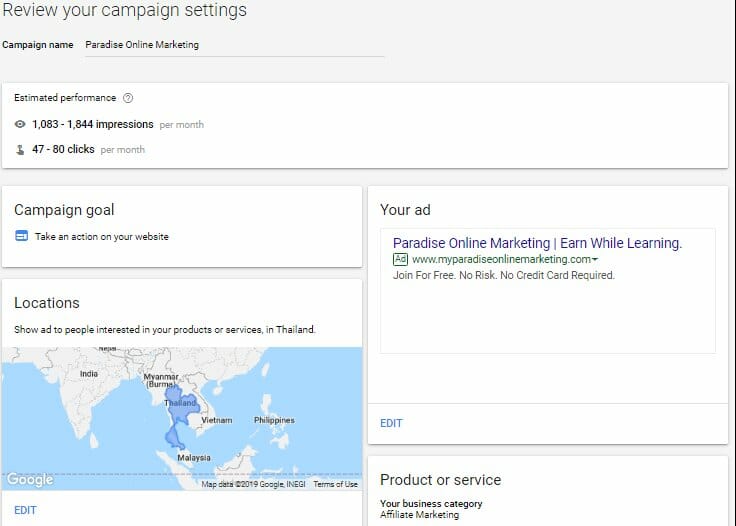
- Every information you have entered is being put together and your ad is finally ready to hit your audience.
- Quickly check through each of the sections and see if anything you need to adjust.
- Click Next when you are good to go.
Step 11: Adding Your Billing Information
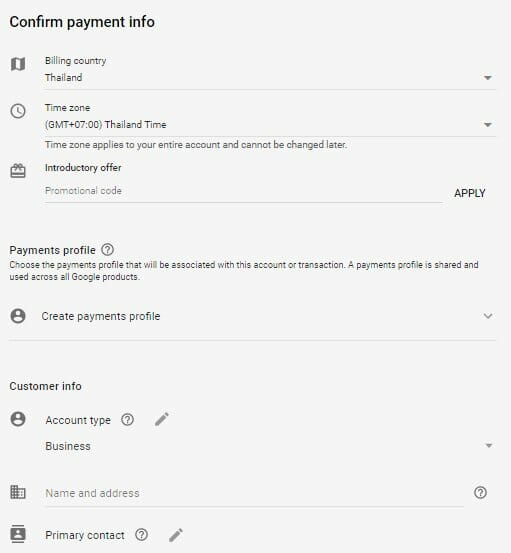
- Choose the payments profile that will be associated with this account or transaction.
- If you have used a payment profile with other Google products earlier with the same Gmail account that you are creating the ad, you can use the same billing information.
- Carefully fill up the profile.
- Once done, Check the Agreement box at the bottom of the page and click Submit.
- You are done and Google is now analyzing the placement of your ads to relevant audiences that you have chosen.
Step 12: Return to Google Ads Campaign Dashboard
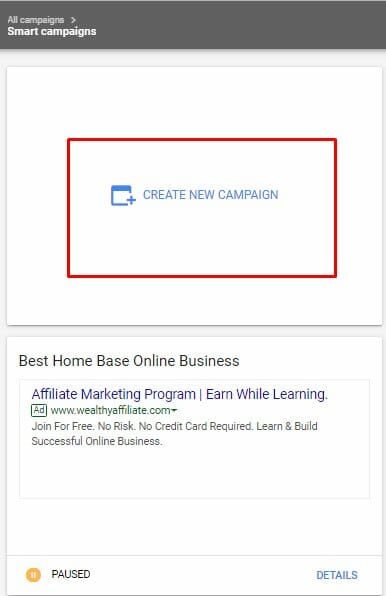
- Click Details at the bottom of your ad to edit your ad.
- Click Create New Campaign to create a new campaign.
By now, you should be well on your way to mastering the steps to create Smart Campaigns that drive traffic to your site. As you continue to follow these steps, you’ll also gain a clearer understanding of how to create search campaigns on Google Ads. For beginners, I highly recommend focusing on Smart Campaigns as they provide an easy way to drive traffic and you only pay when people click on your ads.
Join Wealthy Affiliate for free and visit my profile at PMK to access more free tutorials.
Please leave a comment below with any suggestions for improvement in my next tutorial.

Paul, M.
